
Flutter Mixins and Base Classes: A recipe for success
When developing an app with multiple screens, we tend to reutilize the same piece of code over many classes: showing error messages, using the same page layout and wiring up some dependencies like a Bloc. All this could be solved if we are using an abstract base class, however, what if we have a set of features/classes that we want to use? Since a class can’t be a child of more than one class, should we create different base classes, as much as the number of combinations that we have? That’s why we have mixins.
Mixins and Base Classes: An introduction
Mixins let us add a set of “features” to a class without using parent-child hierarchy, allowing us to have in the same class one parent and multiple mixing. As such, since it’s not a parent of our class, mixins don’t allow any declaration of constructors. You can read more about them in this article by Romain Rastel with the caveat that Dart 2 now has the mixin keyword, as seen in the documentation.
But how do mixins work? Let’s take as an example an abstract class Person
abstract class Person {
  void think() {
    print("Hmm, I wonder what I can do today");
  }
}
We can use this class as a parent using the extend keyword, such as:
class Mike extends Person {}
With this, we can initialise the class and call the parent’s method think().
void main() {
  var mike = Mike();
  mike.think(); // prints: "Hmm, I wonder what I can do today"
}
But what if we want to add new features to Mike? What if Mike is a coder and we want a code function that can be used in other class, but is notused by all Persons? mixins save that problem.
First, we need to create a mixin class and expose the new methods we want to use.
mixin Coder {
  void code() {
    print("Coding intensifies");
  }
}
With the keyword with, we can add this “feature” to our Mike class:
class Mike extends Person with Coder {}
And, as with the parent, we can call all the functions that we created in Coder.
void main() {
  var mike = Mike();
  mike.code(); // prints: "Coding intensifies"
}
Now every class that uses the mixin Coder can effectively code. However, this poses a problem: this means that if we have a parent class Animal that has a child Squirrel, we can also have a Squirrel that can code()! To prevent this, we can “lock” the usage of the mixin to a class and all classes that inherited from it with the keyword on:
mixin Coder on Person{
  void code() {
    print("Coding intensifies");
  }
}
This also gives us a powerful tool: we can now override methods that were set in the Person class to add or change functionality.
mixin Coder on Person{
  //...

  @override
  void think() {
    super.think();
    print("I'm going to code today!");
  }
}
Calling the super.think() ensures that we are still calling the code that was defined in Person. The above code gives us the following output for the method think in. Mike:
Hmm, I wonder what I can do today
I'm going to code today!
By grasping the concepts of both base classes and mixins we can now apply them to our Flutter apps.
Mixins and Base Classes: A practical Flutter Example
How can we apply this in our Flutter apps?
Take as an example the following two screens:
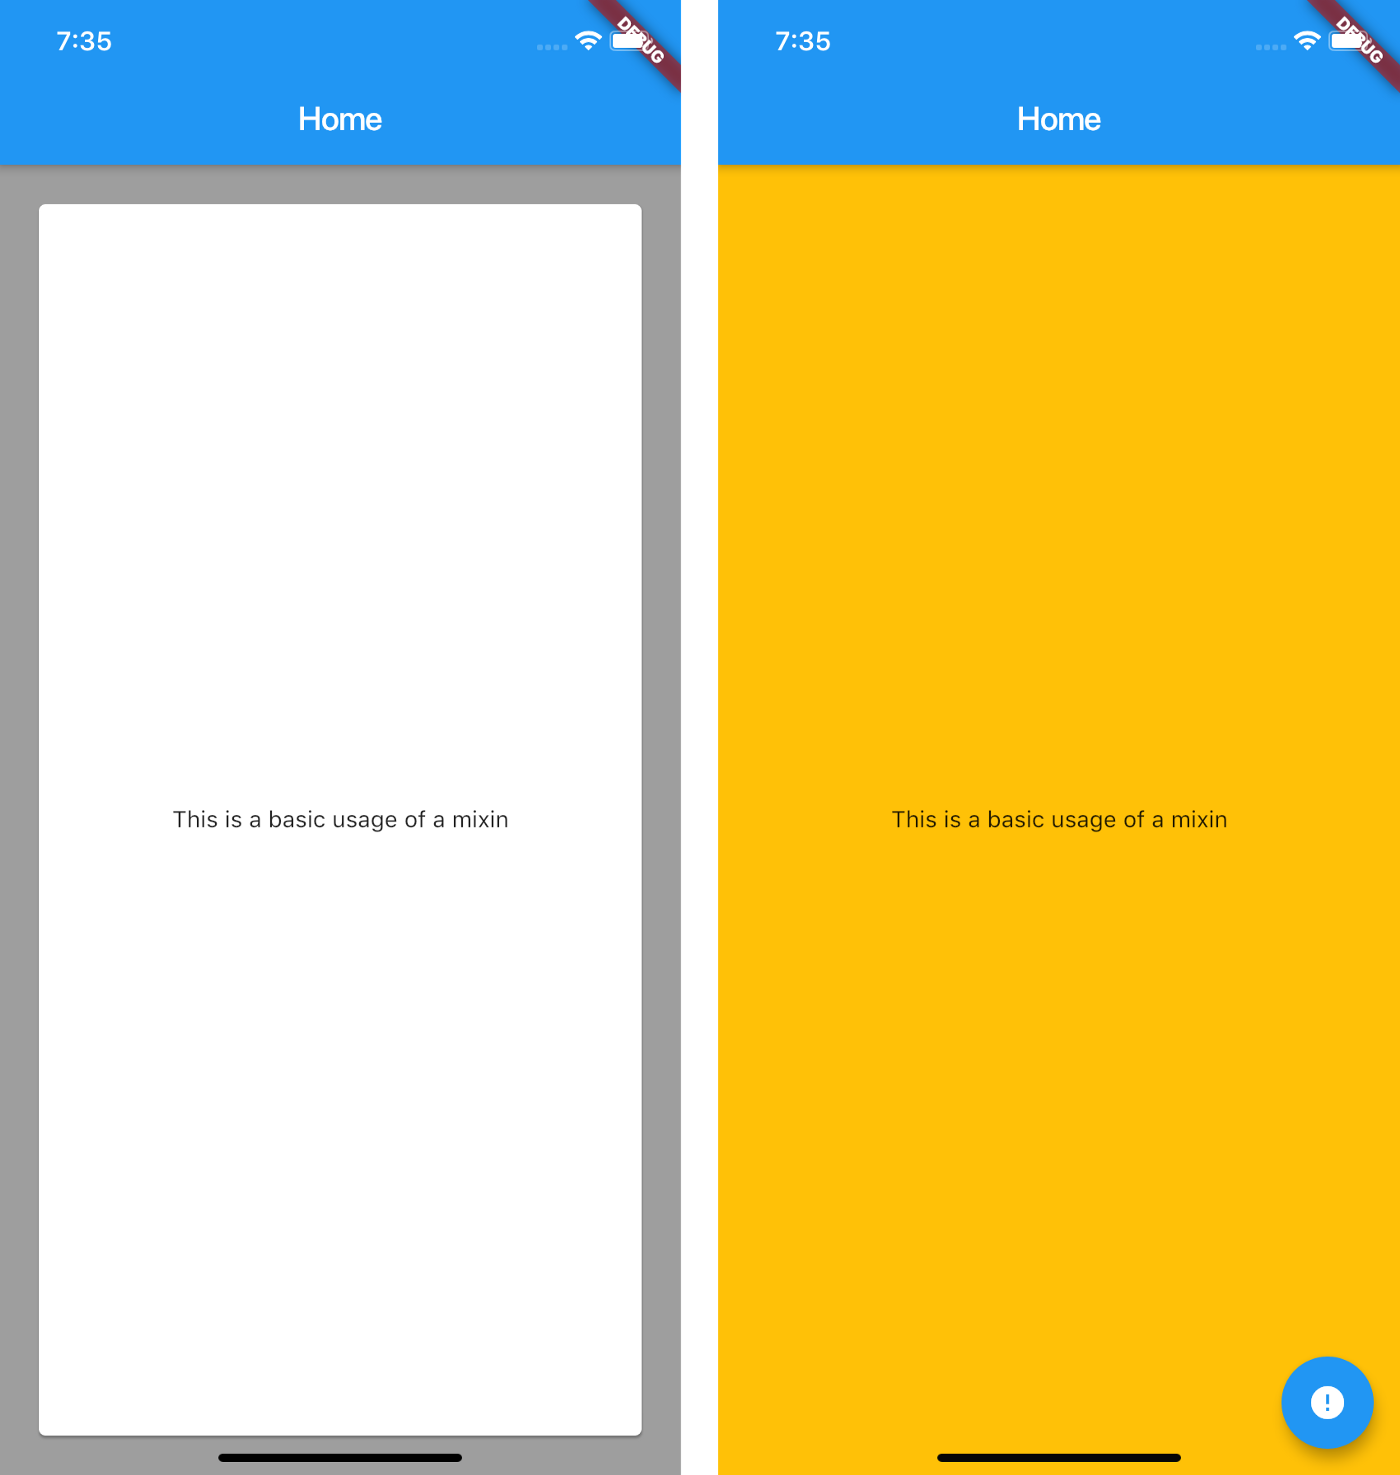
Our app has several screens with the layout shown above. Instead of copying and pasting the appbar and the background for each screen, we can solve our problem using mixins. Let’s focus on the second one.
First, since in both cases we have a screen title defined, we are going to create a base class that has a method to provide our screen name. Second, we choose to apply these mixins only in StatefulWidgets, however, since we already have a class that extends StatefulWidget, we can state that our mixin is only going to be applied to classes that extend BaseState<BasePage>.
abstract class BasePage extends StatefulWidget {
  BasePage({Key key}) : super(key: key);
}

abstract class BaseState<Page extends BasePage> extends State<Page> {
  String screenName();
}
Now we can create our BasicPageMixin, where we define the background and appbar of our page.
mixin BasicPage<Page extends BasePage> on BaseState<Page> {
  @override
  Widget build(BuildContext context) {
    return Scaffold(
        appBar: AppBar(
          title: Text(screenName()),
        ),
        body: Container(
          child: body(),
          color: Colors.amber,
        ));
  }

  Widget body();
}
Since the method body() doesn’t have a body, each class that uses this mixin must implement it, ensuring that we don’t forget to add a body to our page.
In the screenshot above, we see a FloatingActionButton, but we may not need it for every screen, so how can we define it? By declaring a new method, fab() that by default returns a Container. If a class needs to add a FloatingActionButton, they can override this method.
mixin BasicPage<Page extends BasePage> on BaseState<Page> {
  @override
  Widget build(BuildContext context) {
    return Scaffold(
        //...
		  floatingActionButton: fab(),
  }

  //...
	Widget fab() => Container();
}
With this set, we can now create a new page with this mixin and our base class.
class MyHomePage extends BasePage {
  MyHomePage({Key key}) : super(key: key);
  @override
  _MyHomePageState createState() => _MyHomePageState();
}

class _MyHomePageState extends BaseState<MyHomePage> with BasicPage{
  @override
  String screenName() => "Home";

  @override
  Widget body() {
    return Center(child: Text("This is a basic usage of a mixin"));
  }
}
And with this, we now only have to declare a body() widget to be used in each screen, saving us a few dozens of lines of code.
Combining mixins
As a new feature, some of our screens will make API calls and we need to display an error message in the form of a Snackbar. Additionally, we decide to use the BLoC architecture in which we need to inject a new bloc when each page is created. These two problems will need the following steps:
- Change our
BasePageandBaseStateso that it has access to ablocand add it to theBasePage’s constructor - Create a new
mixinthat let us display errors messages sent by theblocin the page using a Snackbar
In our BaseBloc we are just exposing a Sink and a Stream in order to relay error messages.
abstract class BaseBloc {
  /// relays error information
  final _errorSubject = PublishSubject<String>();

  Sink<String> get errorSink => _errorSubject.sink;

  Stream<String> get errorStream => _errorSubject.stream;
}
Since we don’t want any other interactions with the bloc, our HomeBloc will just extend this class
class HomeBloc extends BaseBloc {}
To inject the bloc into our BasePage classes, we need to make some amendments to our class, with one of them being making our class dependant of the type of bloc it has. In order to do that, we use Bloc reference as a generic in the class statement.
abstract class BasePage<Bloc extends BaseBloc> extends StatefulWidget {
  Bloc bloc;
  BasePage({Key key, this.bloc}) : super(key: key);
}
This way, our BaseState can access the correct bloc type using widget.bloc.
As for the BaseState, we are going to declare a scaffoldKey to be used with the ScaffoldWidget so that we can show the Snackbar.
abstract class BaseState<Page extends BasePage> extends State<Page> {
  String screenName();
  GlobalKey<ScaffoldState> scaffoldKey = GlobalKey();
}
As seen before, one of the curious properties of mixing is that if they are “linked” to a class, they can override its methods. This is useful since in our StatefulWidget we can listen do the bloc’s streams in the initState method. As such, to show the error messages, we can create a mixin that overrides the initState method and provides methods to show the error Snackbar with the correct message.
mixin ErrorHandlingMixin<Page extends BasePage> on BaseState<Page> {
  @override
  void initState() {
    super.initState();
    widget.bloc.errorStream
			// this will preven multiple messages from showing up in a short interval of time
        .transform(new ThrottleStreamTransformer((_) => TimerStream(true, const Duration(seconds: 2))))
        .listen((error) => showErrorSnackbar(error, scaffoldKey.currentState));
  }

  void showErrorSnackbar(String event, ScaffoldState context) {
    if (event != null) {
      context.showSnackBar(new SnackBar(
        content: new Text(event),
      ));
    }
  }
}
Finally, mixins aren’t as constrained as a parent class, which we can only have one, so we can add it to our _HomePageState.
class _MyHomePageState extends BaseState<MyHomePage> with BasicPage, ErrorHandlingMixin {
  //...
  @override
  Widget fab() => FloatingActionButton(
    child: Icon(Icons.error),
    onPressed: () => widget.bloc.errorSink.add("A new error!"),
  );
}
Conclusion
And there we go!✌️ Now we can use both mixins and abstract classes to reuse code throughout our application.
Maybe we don’t need to do a base UI for our app, but we can use mixins like the ErrorHandlingMixin to provide error feedback to the user, loading screens and showing a “App is Offline” screen.
However, creating both base classes and mixins is a process that needs some deliberation, else we might face a “Deadly Diamond of Death”, in which when calling one method that is declared in both base classes and mixins, the compiler doesn’t know which one to choose. You can read more about it in Shubham Soni ’s article about mixins in Flutter.
Finally, and as suggested by Remi Rousselet, we should be aware of how the extensive use of mixins can be considered an anti patterns, which you can read more in this article by Dan Abramov.
Want to get the latest articles and news? Subscribe to the newsletter here 👇
And for other articles, check the rest of the blog! Blog - Gonçalo Palma