
Using JavaScript Code in Flutter Web
When building cross-platform applications that can run on web, mobile and desktop, we often don’t need to access the underlying platform - we are either showing static data or we are communicating with a backend server to post and fetch new data.
However, there are cases in which we need to know specifics about the platform - device’s specifications, location or hardware such as camera and sensors - and this is when we will need to communicate with each platform’s native code.
With Android and iOS we use Platform Channels to send and receive messages from the native platform, and we can use PlatformViews to display native UI views on Flutter. But how we can do it in Flutter Web?
JavaScript and Dart
Before Flutter was revealed to the public, Dart was used to build web apps (which you can see from this article from 2013 - Develop modern web apps with Dart by Seth Ladd), which was possible due to two of its features:
- The ability to compile Dart code to JavaScript;
- JavaScript-Dart interoperability via the
jspackage that allows us to call Dart code in JavaScript.
This means that we have a direct way to communicate with JavaScript without the need of using PlatformChannels.
To use it, we must only declare in a separate file the functions in JavaScript that we need to call with the help of the @JS annotation.
As an example, let’s look at the documentation and see how it is possible to use JSON.stringify in Dart:
@JS()
library stringify;

import 'package:js/js.dart';

// Calls invoke JavaScript `JSON.stringify(obj)`.
@JS('JSON.stringify')
external String stringify(Object obj);
First, we must annotate our library statement with the @JS() annotation, followed by the js.dart import statement.
Then, we use @JS to specify which function we are calling, in this case, JSON.stringify and declare an external function with no body, only the required arguments.
Showing an Alert Window on Flutter
One of the reasons we might need to interact with JavaScript is to use a core feature, such as displaying an Alert or Confirm window. These interactions are used to prompt a user before an action - be it navigating away from the website or doing a critical action such as deleting data.

To use it, we must need to use the following code in JavaScript:
confirm("Are you sure");
In out Flutter app, we will want to give it another name, such as showConfirm, as such we will need to use the @JS annotation like in the previous example:
@JS()
library javascript_bundler;

import 'package:js/js.dart';

@JS('confirm')
external void showConfirm(String text);
Then, we can simply call this method on our Flutter app:
void _showConfirmButton() {
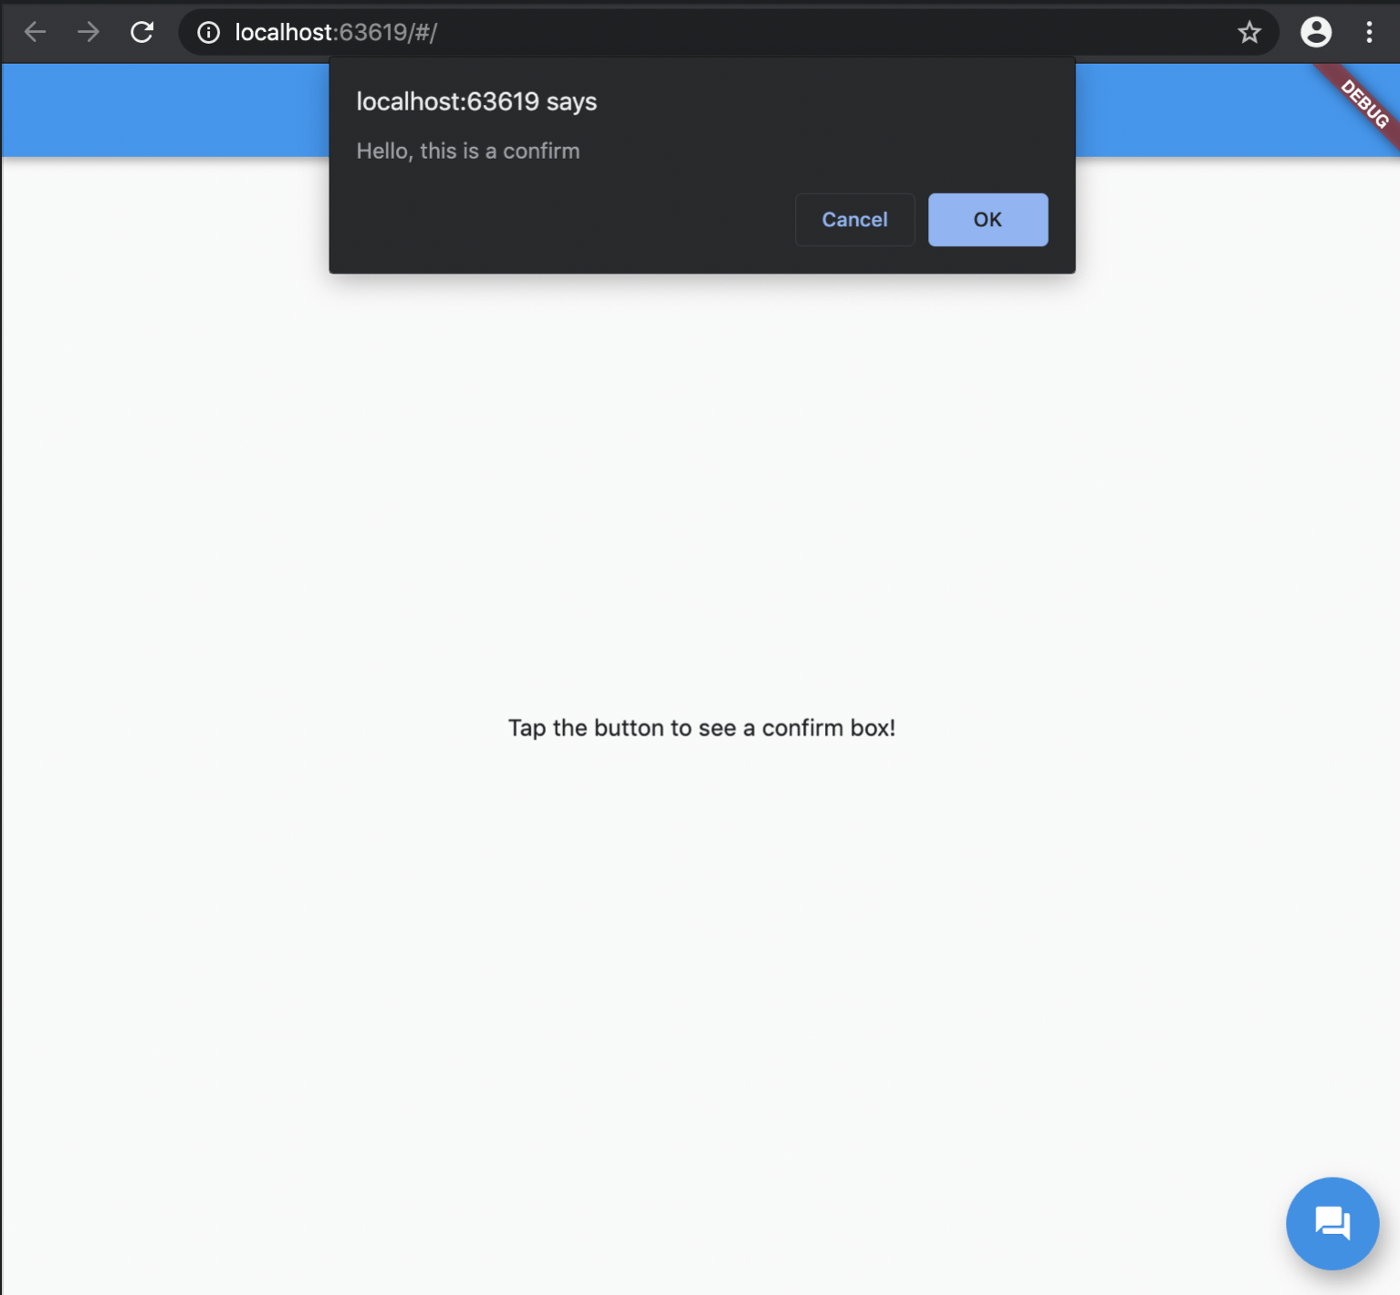
showConfirm("Hello, this is a confirm");
}
And sure enough a new confirm window is going to be displayed to the user:
The Problem of Multiplatform
As stated previously, when using Flutter we can deploy our apps to multiple platforms. However, in the previous example we are using a js library to run JavaScript code, something that both iOS and Android does not support.
If we try to run our app in an iOS device, we will get the following compilation error:
Launching lib/main.dart on iPhone 11 in debug mode...

Running Xcode build...

Xcode build done.                                            8.5s
Failed to build iOS app
Error output from Xcode build:
↳
    ** BUILD FAILED **


Xcode's output:
↳
    lib/main.dart:2:66: Error: Unexpected token ';'.
    import 'package:flutter_dart_js/bundler/javascript_bundler.dart';;
                                                                     ^
    ../../../.pub-cache/hosted/pub.dartlang.org/js-0.6.2/lib/js.dart:8:1: Error: Not found: 'dart:js'
    export 'dart:js' show allowInterop, allowInteropCaptureThis;
    ^
    Unhandled exception:
    FileSystemException(uri=org-dartlang-untranslatable-uri:dart%3Ajs; message=StandardFileSystem only supports file:* and data:* URIs)
    #0      StandardFileSystem.entityForUri (package:front_end/src/api_prototype/standard_file_system.dart:33:7)
    #1      asFileUri (package:vm/kernel_front_end.dart:659:37)
    #2      writeDepfile (package:vm/kernel_front_end.dart:853:21)
    <asynchronous suspension>
    #3      FrontendCompiler.compile (package:frontend_server/frontend_server.dart:574:15)
    <asynchronous suspension>
    #4      _FlutterFrontendCompiler.compile (package:flutter_frontend_server/server.dart:43:22)
    #5      starter (package:flutter_frontend_server/server.dart:182:27)
    #6      main (file:///b/s/w/ir/cache/builder/src/flutter/flutter_frontend_server/bin/starter.dart:9:30)
    #7      _startIsolate.<anonymous closure> (dart:isolate-patch/isolate_patch.dart:299:32)
    #8      _RawReceivePortImpl._handleMessage (dart:isolate-patch/isolate_patch.dart:168:12)


    Command PhaseScriptExecution failed with a nonzero exit code
    note: Using new build system
    note: Planning build
    note: Constructing build description
This means that when compiling for other platforms, we cannot use this code. One way to go around this is to use conditional importing, which you can read more in Antonello Galipò’s Article: Conditional imports across Flutter and Web.
We start by creating a stub class in which we declare all the methods we will be using, in this case the showConfirm method:
void showConfirm(String message) {
  throw UnimplementedError();
}
Then, we can have one file per platform where we specify the implementation of the showConfirm method. For our purpose, we are going to leave this as it is, since it enables us to compile our app to all platforms, if needed we will specify the implementation in the future.
Finally, we change our simple imports to conditional imports at the top of the file where we use the showConfirm method:
import 'package:flutter_dart_js/bundler/stub_bundler.dart'
    if (dart.library.js) 'package:flutter_dart_js/bundler/javascript_bundler.dart';
In summary, this is importing the stub_bundler.dart by default, however, if it sees that the platform has the dart.library.js code available (such as in Flutter Web), it will import the second file, where we put our code to show a JavaScript confirm window. This will enable us to compile our code to any platform with the only caveat being that when we call that function on any platform other than web, we will get an UnimplementedError.
Adding Custom JavaScript Libraries
While developing our apps, there might be the need to add a specific feature that has been already in the platform that we are developing for, as an example, let’s take Google Maps.
Google Maps libraries are widely available for Android, iOS and Web, and instead of recreating it in Flutter, Google’s approach was to use these native libraries and display them in Flutter (you can see the implementation in the officialgoogle_maps_ flutter GitHub repository).
In the case of web, we don’t have a Pod file or gradle to add our dependencies, so we must add them to our web folder, either declaring them on the index.html file directly or by adding a new .js file in the structure.
As an example, we will add Voca, a library that will aid us with String manipulation, such as converting text to camel case.
We start by downloading the normal, not minified version, of voca.js file so that we can take a peek into the class names and comments.
Then, we add it to our project, in a js folder inside web
└── web
	  ├── ...
    ├── index.html
    └── js
        └── voca.js
In our index.html file, we can add the script right below the main.dart.js script:
<body>
	<script src="main.dart.js" type="application/javascript"></script>

	<script src="js/voca.js"></script>
</body>
Before integrating any other code, we run the app to verify if there are any errors present, and though the app runs, the Chrome Dev Tools (F12), shows a long error message that starts with:
Uncaught Error: Mismatched anonymous define()
A quick google search will show the Require.js website with the following page: Mismatched anonymous define() modules …. Upon further inspection we see that Require.js is a JavaScript library that enable us to load new modules into our web app, using a specific functions such as define, which voca.js . As such, let us dive into the Start page to integrate it in our Flutter app.
The first thing that we need to do is to rearrange the structure of the code to follow Require.js standards:
└── web
    ├── ...
    ├── index.html
    └── js
        ├── main.js
        ├── require.js
        └── scripts
            └── voca.js
For require.js, we just need to download the latest binary from the Download section of the website and add it to the js folder. The same applies for the scripts/voca.js, since we are just moving the voca.js file from the root folder to a scripts folder.
However, in main.js file we will specify all the JavaScript dependencies our project requires. To make this module accessible in Dart, we can add them to the window:
define(function(require) {
    window.v = require('./scripts/voca');
});
Reading the documentation for voca.js, we see that we will need to access v in order to call each function. As such, we will create a @JS() class in Dart and specify each static method that we want to use:
@JS('v')
class V {
  @JS('camelCase')
  external static String camelCase(String text);
}
To call this method, we will just need to call:
var camelCase = V.camelCase("Some text");
Finally, since we are want to make our project compilable for all platforms, we create a new method called toCamelCase in which we call V.camelCase directly. This means that both our stub file and the remaining mobile and desktop implementations will just need to create a method called toCamelCase instead of a specific class and a static method:
@JS('v')
class V {
  @JS('camelCase')
  external static String camelCase(String text);
}

String toCamelCase(String text) => V.camelCase(text);
In our Flutter app, we will be able to call this function directly:
  @override
  void initState() {
    super.initState();
    _controller.addListener(() {
      setState(() => camelCase = toCamelCase(_controller.text));
    });
  }
Conclusion
As with Flutter for mobile devices, it’s always possible to communicate with the underlying platform to access a native API or a specific library. For Flutter Web, we have our life simplified since we don’t need to use a PlatformChannel and can instead call the code (almost) directly with the js library.
Thankfully, the Dart team already has provided us with a lot of out-of-the-box methods for the most common operations via the window variable:
import 'dart:html';

window.alert("This is an alert"); //shows an Alert Dialog
window.location.href; // Shows the current URL, ex. https://www.google.com/
However, each time that we want to add an external library, we will need to rely on the js library and create the bindings.
Want to get the latest articles and news? Subscribe to the newsletter here 👇
And for other articles, check the rest of the blog! Blog - Gonçalo Palma