
Using WebSockets in Flutter
Photo by Peter Herrmann on Unsplash
Nowadays, many applications need real-time data to provide instant feedback to the user. Be it a chat application in which we can see if the other person is typing in real-time, or a remote application that is plotting data directly from a hardware sensor.
We try to solve these problems with REST but face a complex problem: to have near-instant feedback, we must ping the server several times per minute, which can be architecturally difficult to achieve and it overloads the server.
However, if using solutions like Firebase Realtime Database, you can notice that as soon as a new record adds to the database, the Flutter application receives it as a `Stream`` and you show the data to the user.
But how does Firebase achieve this? The reality is, frameworks such as Firebase and others rely on a very important piece of technology: WebSockets.
In this article, we’re going to explore how we can use our own WebSockets to create applications that display real-time data to our users.
What are WebSockets?
According to Mozilla, WebSockets is “an advanced technology that makes it possible to open a two-way interactive communication session between the user’s browser and a server… you can send messages to a server and receive event-driven responses without having to poll the server for a reply.”
In a nutshell, we can say that WebSockets are composed of:
- A server that streams information
- A
clientin the application that is ready to receive the new stream of data - A
channelwhich will be the communication between theclientand the server. Messagesthat are sent between theclientand the server.
As opposed to REST, with WebSockets, we don’t await a response from the server after we send a message to it. We can send one message and receive dozens of incoming messages from the server.
In a way, you can think of it as subscribing to notifications; we subscribe to a specific topic, for example, the exchange value of USD-EUR, and then we receive a new message from the server each time that the USD-EUR exchange value changed.
This real-time communication stream makes WebSockets the ideal technology to use for stock-exchange apps, chat applications, IoT apps, and every other app that must receive an incoming stream of data.
The question is, how can we use them in Flutter?
WebSockets in Dart
Fortunately, Dart provide us with an out-of-box solution for dealing with WebSockets, the WebSocket class. If we are developing apps for only one target (either desktop, or web or mobile), then we can use it safely. However, the moment we opt to use our app multi-platform, we will need to be aware that underneath it relies on dart:io and dart:html, which means that we will not be able to compile for both mobile and web at the same time. Thankfully, the Dart team created the web_socket_channel, an official library that abstracts the dart:io and dart:html logic and allow us to use one class to create a Multiplatform application.
To use web_spclet_channel, we need to follow 3 simple steps:
- Create a new client with
WebSocketChanneland connect to a channel via theconnectfunction - Listen to incoming messages with the
streamgetter - Using the
sinkgetter we will be able to send messages to the server.
For this current article, we will use as an example the CoinBase Pro API to get the realtime value of cryptocurrencies via WebSockets.
Let’s start by creating a brand new Dart Project. On the command line, use the following command to create a new Dart project:
dart create websocket_example
This will create a new Dart-only project in the websocket_example folder.
Then, open the project in your favorite IDE, and add the web_socket_channel dependency:
dependencies:
  web_socket_channel: ^2.1.0
Opening a new WebSocket
With the project created, let’s look at CoinBase Pro API.
Our WebSocket client will need to connect to the URI wss://ws-feed.pro.coinbase.com to receive updates. In order to listen to those updates, we will need to listen for any incoming messages:
import 'package:web_socket_channel/web_socket_channel.dart';

void main(List<String> arguments) {
  /// Create the WebSocket channel
  final channel = WebSocketChannel.connect(
    Uri.parse('wss://ws-feed.pro.coinbase.com'),
  );

  /// Listen for all incoming data
  channel.stream.listen(
    (data) {
      print(data);
    },
    onError: (error) => print(error),
  );

}
Next, we want to receive updates from the server with the current value of BTC-EUR, so we use the Subscribe message from the API. To send a message to the server, we can use the sink from our newly created WebSocketChannel to send a JSON message to the server:
import 'dart:convert';

import 'package:web_socket_channel/web_socket_channel.dart';

void main(List<String> arguments) async {
  /// Create the WebSocket channel
  final channel = WebSocketChannel.connect(
    Uri.parse('wss://ws-feed.pro.coinbase.com'),
  );

  channel.sink.add(
    jsonEncode(
      {
        "type": "subscribe",
        "channels": [
          {
            "name": "ticker",
            "product_ids": [
              "BTC-EUR",
            ]
          }
        ]
      },
    ),
  );

  /// Listen for all incoming data
  channel.stream.listen(
    (data) {
      print(data);
    },
    onError: (error) => print(error),
  );
}
To see it in action, we can use the dart run bin/web_socket_example.dart command. Hopefully we will see new logs being printed with incoming messages from CoinBase Pro API:
{"type":"subscriptions","channels":[{"name":"ticker","product_ids":["BTC-EUR"]}]}
{"type":"ticker","sequence":12764748963,"product_id":"BTC-EUR","price":"36941.64","open_24h":"38285.55","volume_24h":"4722.06983151","low_24h":"34300","high_24h":"38674.98","volume_30d":"43802.53509763","best_bid":"36934.04","best_ask":"36941.64","side":"buy","time":"2021-09-21T08:00:20.424250Z","trade_id":50228771,"last_size":"0.08072577"}
{"type":"ticker","sequence":12764749180,"product_id":"BTC-EUR","price":"36941.55","open_24h":"38285.55","volume_24h":"4722.08309939","low_24h":"34300","high_24h":"38674.98","volume_30d":"43802.54836551","best_bid":"36933.09","best_ask":"36941.55","side":"buy","time":"2021-09-21T08:00:21.167335Z","trade_id":50228772,"last_size":"0.01326788"}
One question remains: we can open a channel, but how can we close it?
Closing a WebSocket
The same way we access the underlying sink to send new data to the server, we can use it to also close the connection after a period of time:
void main(List<String> arguments) async {
  // ...

  /// Wait for 5 seconds
  await Future.delayed(Duration(seconds: 5));

  /// Close the channel
  channel.sink.close();
}
If we re-run the app, we see that after 5 seconds it will close the channel, and the application.
Displaying Realtime Data in Flutter
To test this in a Flutter App, we will build a simple mobile and web application that will:
- Show values for ETH-EUR
- Show values for BTC-EUR
- Close both channels if the user wants that
For that purpose, we’ll use two different socket channels, one that will receive the ETH-EUR messages, and another that receives the BTC-EUR messages. However, keep in mind that the CoinBase Pro API lets us use one single channel to receive multiple values, we could use that and then map the incoming messages to be displayed in different Widgets
Instead of using plain Maps to receive and send messages to the server, we will create the appropriate CoinbaseRequest and CoinbaseResponse classes and use json_serializable to make it easier to serialize and deserialize them.
import 'package:json_annotation/json_annotation.dart';

part 'coinbase_request.g.dart';

@JsonSerializable()
class CoinbaseRequest {
  final String type;
  final List<Map<String, dynamic>> channels;

  CoinbaseRequest(this.type, this.channels);

  factory CoinbaseRequest.fromJson(Map<String, dynamic> json) =>
      _$CoinbaseRequestFromJson(json);

  Map<String, dynamic> toJson() => _$CoinbaseRequestToJson(this);
}
import 'package:json_annotation/json_annotation.dart';

part 'coinbase_response.g.dart';

@JsonSerializable()
class CoinbaseResponse {
  final String price;
  @JsonKey(name: 'product_id')
  final String productId;

  CoinbaseResponse(this.price, this.productId);

  factory CoinbaseResponse.fromJson(Map<String, dynamic> json) =>
      _$CoinbaseResponseFromJson(json);

  Map<String, dynamic> toJson() => _$CoinbaseResponseToJson(this);
}
To isolate our WebSocket logic, we will create a CoinbaseProvider which will be responsible for:
- Creating the WebSocket channel - via the constructor;
- Sending messages to the channel -
openBitcoin - Exposing a
Streamof data -bitcoinStream - Closing the WebSocket channel -
closeBitcoin
The same applies to Ethereum, but to make the example more readable, we will present only the code for BTC-EUR.
/// Manages opening and closing the sockets for the
/// two different sockets: ETH socker and BTC socket
class CoinbaseProvider {
  late final WebSocketChannel _btcWebsocket;

  static const _btcProduct = "BTC-EUR";

  CoinbaseProvider()
      : _btcWebsocket = WebSocketChannel.connect(
          Uri.parse('wss://ws-feed.pro.coinbase.com'),
        );

  Stream<CoinbaseResponse> get bitcoinStream => _btcWebsocket.stream
      .map<CoinbaseResponse>(
          (value) => CoinbaseResponse.fromJson(jsonDecode(value)))
      .skipWhile((element) => element.productId != _btcProduct);

  void openBitcoin() {
    _btcWebsocket.sink.add(
      jsonEncode(
        CoinbaseRequest(
          'subscribe',
          [
            {
              "name": "ticker",
              "product_ids": [_btcProduct]
            }
          ],
        ).toJson(),
      ),
    );
  }

  void closeBitcoin() {
    _btcWebsocket.sink.close();
  }
From our previous experience, we discovered that WebSockets in Dart expose a Stream in order to receive incoming messages from the server, which means that we will need a Widget that will receive a Stream and react to it. For that, we can use the StreamBuilder Widget. This Widget will tell us if:
- We are waiting for data;
- We received data;
- We received an error;
- The stream closed with a
doneevent.
Using our provider, we can create a Widget that will display the previous states:

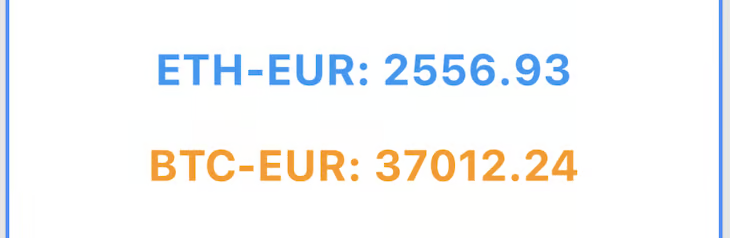
We can show our received data by displaying the current price for both ETH-EUR and BTC-EUR.
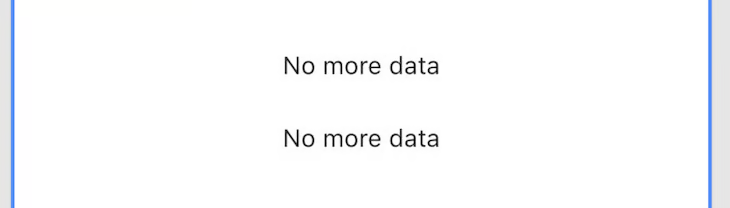
And, we can close the WebSockets and display, “No more data.”
With the StreamBuilder connectionState and data to get information regarding each state, and act accordingly:
class CoinPrice extends StatelessWidget {
  final Stream<CoinbaseResponse> stream;
  final Color color;

  const CoinPrice({
    required this.stream,
    required this.color,
    Key? key,
  }) : super(key: key);

  @override
  Widget build(BuildContext context) {
    return Padding(
      padding: const EdgeInsets.all(12.0),
      child: StreamBuilder<CoinbaseResponse>(
        stream: stream,
        builder: (context, snapshot) {
          /// We are waiting for incoming data data
          if (snapshot.connectionState == ConnectionState.waiting) {
            return const Center(
              child: CircularProgressIndicator(),
            );
          }

          /// We have an active connection and we have received data
          if (snapshot.connectionState == ConnectionState.active &&
              snapshot.hasData) {
            return Center(
              child: Text(
                '${snapshot.data!.productId}: ${snapshot.data!.price}',
                style: TextStyle(
                  color: color,
                  fontSize: 24.0,
                  fontWeight: FontWeight.bold,
                ),
              ),
            );
          }

          /// When we have closed the connection
          if (snapshot.connectionState == ConnectionState.done) {
            return const Center(
              child: Text(
                'No more data',
                style: TextStyle(
                  color: Colors.red,
                ),
              ),
            );
          }

          /// For all other situations, we display a simple "No data"
          /// message
          return const Center(
            child: Text('No data'),
          );
        },
      ),
    );
  }
}
Having completed our Widget that receives the stream of data, we proceed to our Button Widget to send a message to the CoinBase server in order to receive information about the current price of BTC-EUR and another button that will close all socket connections. Since we created a provider that exposes a simple method openBitcoin, and closeBitcoin:
/// Send WebSocket message to receive information
/// regarding a certain coin
///
/// Usage:
/// ```dart
/// CoinButton(
///  isSocketOpen: _showBitcoin,
///  title: "BTC",
///  backgroundColor: Colors.orange,
///  onTap: (isSocketOpen) {
///    if (!isSocketOpen) {
///      widget.provider.openBitcoin();
///      setState(() => _showBitcoin = true);
///    }
///  },
///)
/// ```
class CoinButton extends StatelessWidget {
  final bool isSocketOpen;
  final String title;
  final Function(bool) onTap;
  final Color backgroundColor;

  const CoinButton({
    required this.isSocketOpen,
    required this.title,
    required this.onTap,
    required this.backgroundColor,
    Key? key,
  }) : super(key: key);

  @override
  Widget build(BuildContext context) {
    return MaterialButton(
      onPressed: () => !isSocketOpen ? onTap(isSocketOpen) : null,
      color: backgroundColor,
      child: Row(
        children: [
          if (!isSocketOpen)
            const Icon(
              Icons.close,
              color: Colors.red,
            ),
          if (isSocketOpen)
            const Icon(
              Icons.check,
              color: Colors.green,
            ),
          Text(title),
        ],
      ),
    );
  }
}

/// Button to close the WebSocket connection
class CloseSocketsWidget extends StatelessWidget {
  const CloseSocketsWidget({
    Key? key,
    required this.provider,

  }) : super(key: key);

  final CoinbaseProvider provider;

  @override
  Widget build(BuildContext context) {
    return MaterialButton(
      color: Colors.red,
      child: Row(
        mainAxisAlignment: MainAxisAlignment.center,
        children: const <Widget>[
          Icon(
            Icons.warning,
            color: Colors.white,
          ),
          SizedBox(
            width: 12.0,
          ),
          Text(
            "CLOSE SOCKETS",
            style: TextStyle(
              color: Colors.white,
            ),
          )
        ],
      ),
      onPressed: () {
        provider.closeBitcoin();
        provider.closeEthereum();
      },
    );
  }
}
Putting it all together, we can create a simple app that shows different coin prices in realtime:
Conclusion
There will be times in which we need to display realtime data to the user, and as we have seen, WebSockets can make the process easy for us with just 4 simple steps:
- Create a client
- Connect the client to a channel
- Send messages to the server
- Listen for incoming messages
This will allow us to create Reactive applications in which our StreamBuilders change according to the current state - are we waiting for new data? Did we receive an error? Or new data? Which can be translated into UI components, such as the animation indicating that someone is typing in a chat or updating the value of a graph in the current page.
So now, a question for you! Have you ever had the need to display realtime data to users in your applications? If so, what did you use? Firebase? WebSockets? gRPC server-side Stream?
I’m very curious to hear back from you 😁
To see the full code you can check the following repository at GitHub.
Originally published at LogRocket - Using WebSockets in Flutter.
Want to get the latest articles and news? Subscribe to the newsletter here 👇
And for other articles, check the rest of the blog! Blog - Gonçalo Palma