Flavors in Flutter Web
When we are developing mobile Flutter applications, we know we can make use of flavors. Flavors allow us to handle different configurations for different environments - development, staging, production - adding custom assets and settings to each version of the app.
However, we don’t have the same in Flutter for Web. And sometimes it poses a problem - how can we create different versions of the same web application using a system like flavors? For example, how can we have different keys for JS libraries like Google Maps or have different Firebase configurations initialised in our Index.html file?
In this article we are going to explore how we can add these configurations dynamically and per environment.
The Problem - Setting up Google Maps
In recent months, the Flutter team has been working on creating Flutter Web implementations of their most popular plugins, such as url_launcher, google_sign_in and google_maps_flutter. In the case of both google_sign_in and google_maps_flutter there’s a small catch - we need to add to our index.html file a new line where we add the correct API key:
<head>

  <!-- // Other stuff -->

  <script src="https://maps.googleapis.com/maps/api/js?key=YOUR_API_KEY"></script>
</head>
This might be fine if we are creating a prototype application or if we want that our API key is shared between the different environments. But what if we want to have different keys?
The First Solution - Multiple Index.html Files
One of the possible solutions to our problem is to create several index.html files that reflect our environments: index-dev.html, index-stg.html, index-prd.html. In each of these files we could set up the configurations specific to each environment.
Then, in order to run the correct configuration, all we had to do is to copy the contents from the correct environment into index.html and voilá!
However, we must stop and reflect - does this solution fix our problem? Or does it originate additional problems down the line?
- By creating multiple files, we are triplicating the effort - if tomorrow we need to add a new library, all three files need to be updated. Or if a key needs to be changed, we need to change it only in the necessary files.
- On the other hand, this relies on our memory to always change the files when running or deploying our app or to create tools that enable us to do this process. The first approach might lead to incorrect configurations being pushed to production while the later need us to expend some time to create the tools.
Ultimately, if having different configuration files for the index.html is cumbersome what can we do? We can try to load the configurations dynamically via Dart.
Loading Configurations Dynamically with Dart
As stated in previous articles, long before Flutter adopted Dart, Dart was a proposed solution for JavaScript in Web. This means that there are already some out-of-the-box solutions to communicate with JavaScript (see Using JavaScript in Flutter Web), and potentially with HTML, which is precisely what we need for our situation.
But first let us analyze our problem again. As described in the documentation for google maps, we need to add a:
scriptelement to ourindex.htmlfile- This element will be in the document’s
head - Inside it we will add a
srcwith the Google Maps API and the correct API Key.
Creating a Custom HTML element with Dart
From the official documentation on Adding an Element to the DOM Tree we see that it is possible to create different HTML elements to be inserted in the DOM (Document Object Model) since Dart already provide them out-of-the-box.
In our case, we want to create a <script> element, and conveniently we have in Dart the ScriptElement that represents this object. Which means that the first thing that we need to do is to create a new instance of this object:
void createScriptElement() {
  /// Create a new JS element
  ScriptElement script = ScriptElement();
}
With the element created, we can now access and modify its properties, such as src and id:
void createScriptElement() {
  /// Create a new JS element
  ScriptElement script = ScriptElement();

  /// On that script element, add the `src` and `id` properties
  script.src = "https://www.some-website-with-api/api=dev-key";
  script.id = "super-script";
}
Since we want our element to be added in the <head>, we need now to be able to access it, and we can do so with the document variable. Then, we can simply access the head and append our element:
void createScriptElement() {
  /// Create a new JS element
  ScriptElement script = ScriptElement();

  /// On that script element, add the `src` and `id` properties
  script.src = "https://www.some-website-with-api/api=${currentFlavor()}";
  script.id = "super-script";

  document.head.append(script);
}
We can now add this function to our main function, so that it runs before our app starts:
void main() {
  createScriptElement();

  runApp(MyApp());
}
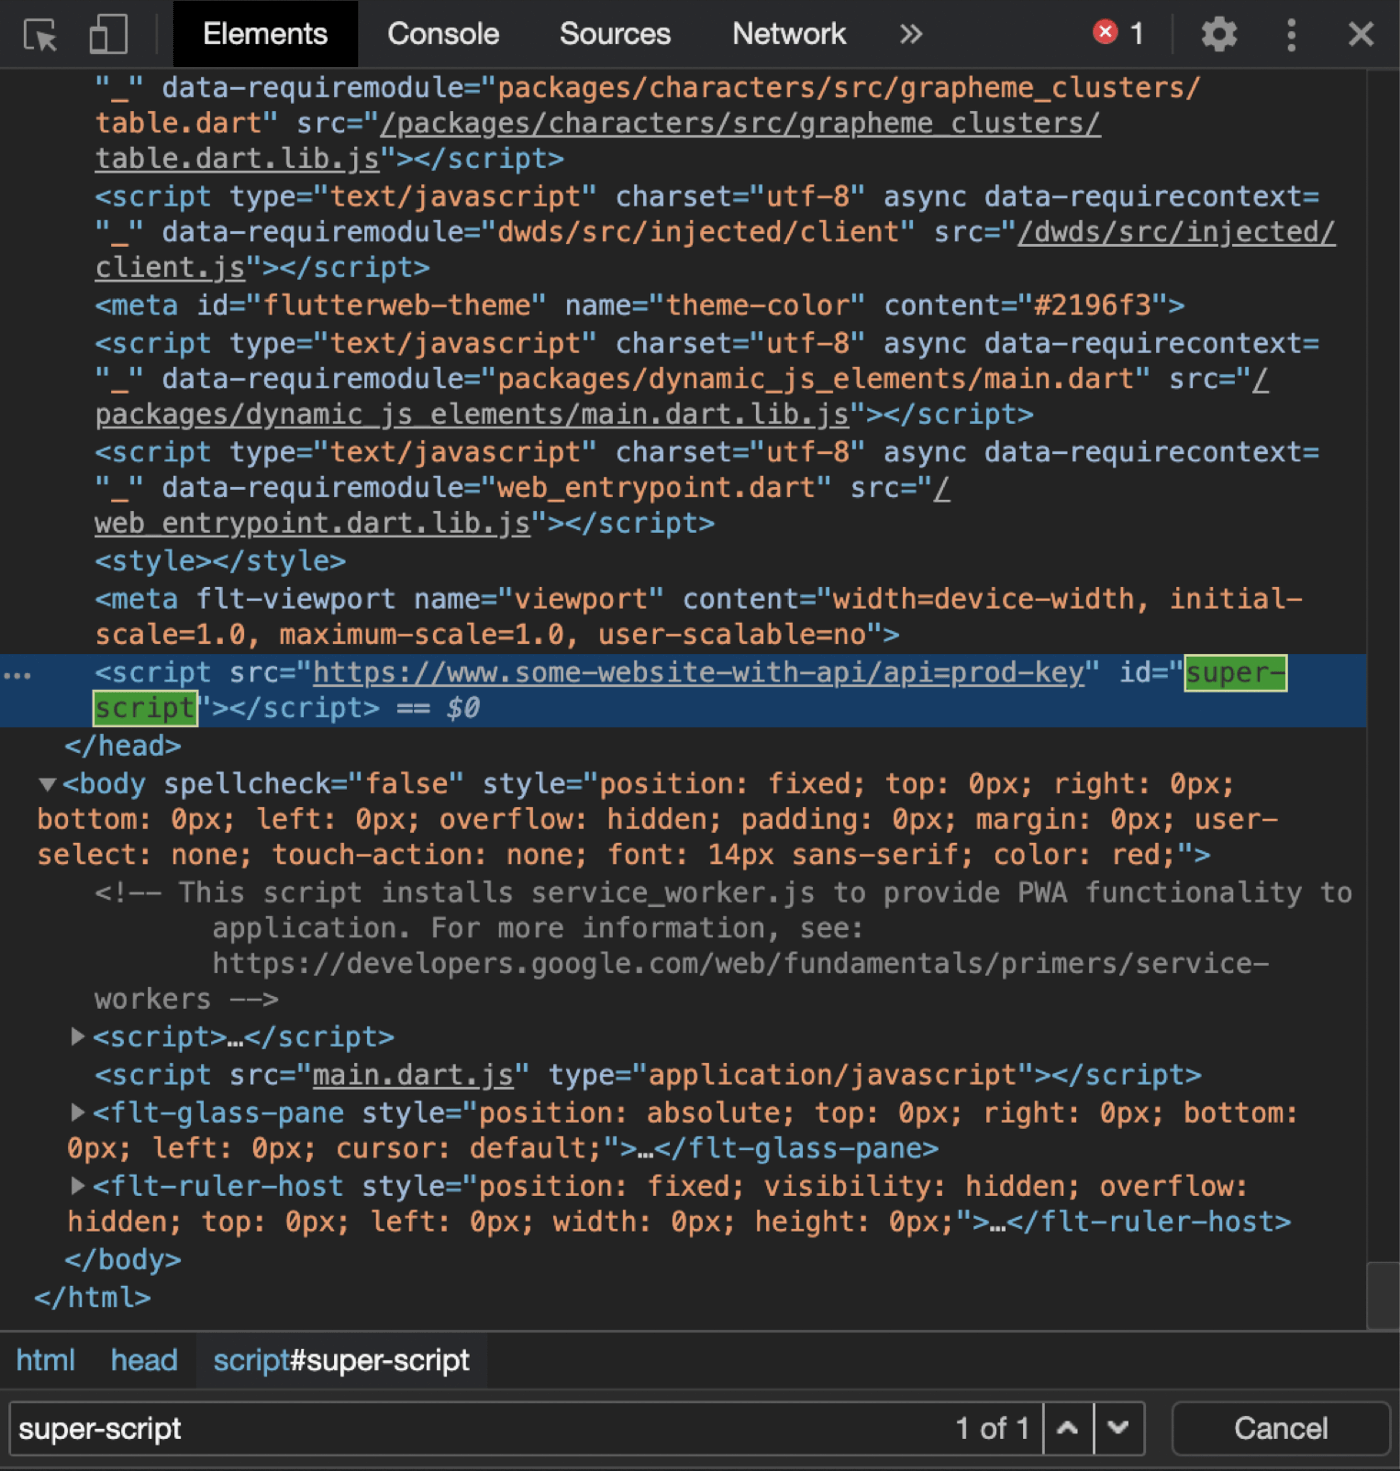
When running our app, we will be able to look at the Developer Tools and search the element tree for the super-script:

Loading Our Configurations Dynamically
As stated at the start of the article, Flutter Web does not support flavours yet, which means that it won’t be possible to do the following:
flutter run -d chrome --flavor dev
At the end of the day, what we want is a convenient method of passing from the command line (or IDE) to our app the environment that we are currently using, without having to change our code.
With flutter run help -v we can see the list of all available arguments to run our app and we will find the following:
$ flutter run help -v
# ...
    --dart-define=<foo=bar>   Additional key-value pairs
                              that will be available as
                              constants from the
                              String.fromEnvironment,
                              bool.fromEnvironment,
                              int.fromEnvironment, and
                              double.fromEnvironment
                              constructors.
                              Multiple defines can be
                              passed by repeating
                              --dart-define multiple
                              times.
Which means that if we use:
flutter run --dart-define=flavor="dev"
We will be able to retrieve the flavor in our Dart code:
String currentFlavor() {
  final flavor = const String.fromEnvironment("flavor");
  //...
}
Additionally, we can use the parameter defaultValue to set dev as a default:
String currentFlavor() {
  final flavor = const String.fromEnvironment("flavor", defaultValue: "dev");
  // ...
With this, we can now create two different flavors - dev and prod. For each, we will create a new key:
const String flavorDev = "dev-key";
const String flavorProd = "prod-key";

String currentFlavor() {
  final flavor = const String.fromEnvironment("flavor", defaultValue: "dev");
  if (flavor == "prod") {
    return flavorProd;
  }

  return flavorDev;
}
Why are we using const arguments? Because as we can see from Antonello Galipò’s article Excluding Dart code from the release compiled executable, if we follow this approach our dev keys won’t be compiled in the production release code, and our prod keys won’t be compiled in our development release.
Finally, we can combine this with the creation of our ScriptElement to retrieve the correct environment key:
void createScriptElement() {
  /// Create a new JS element
  ScriptElement script = ScriptElement();

  /// On that script element, add the `src` and `id` properties
  script.src = "https://www.some-website-with-api/api=${currentFlavor()}";
  script.id = "super-script";

  document.head.append(script);
}
Conclusion
Já está! 🎊 With this approach we are:
- Creating
<script>elements dynamically - Storing all our keys and configurations in
Dart, making it thede-factosource of truth for all our API keys - Using the command line argument
--dart-defineto change environments on the go:
flutter run -d chrome --dart-define=flavor=dev
# compiles the development environment
flutter run -d chrome --dart-define=flavor=prod
# compiles the production environment
We could expand the use of —dart-define to not only store the keys that we use in the index.html file but also all other keys and configurations needed for our code.
On the other hand, we could also explore adding all the necessary script lines for libraries such as firebase analytics via this method, or even the firebase configurations.
In the end, this let us more and more centralize our source of truth in Dart, without the need of using separate files. This makes it easier for us and for other to understand our code and easier to change all the keys in the future when necessary.
Want to get the latest articles and news? Subscribe to the newsletter here 👇
And for other articles, check the rest of the blog! Blog - Gonçalo Palma
